> ## Documentation Index
> Fetch the complete documentation index at: https://frenglish.mintlify.site/llms.txt
> Use this file to discover all available pages before exploring further.
# Configuración de Stytch para Embedded Wallet
> Aprenda cómo configurar un cliente Stytch para su instancia de Embedded Wallet. Siga los pasos para crear y obtener un Public Token desde el panel de Stytch.
Para integrar la autenticación de Stytch en su instancia de Embedded Wallet, debe configurar una aplicación en el [Stytch Dashboard](https://stytch.com/dashboard) y configurar un Embedded Wallet en [Sequence Builder](https://sequence.build/). Comience siguiendo estos pasos:
La autenticación con Stytch actualmente está en acceso anticipado. Para habilitarla, visite [https://sequence.build/earlyaccess](https://sequence.build/earlyaccess) y active la funcionalidad.
Primero, acceda a la [página de inicio de sesión](https://stytch.com/dashboard):
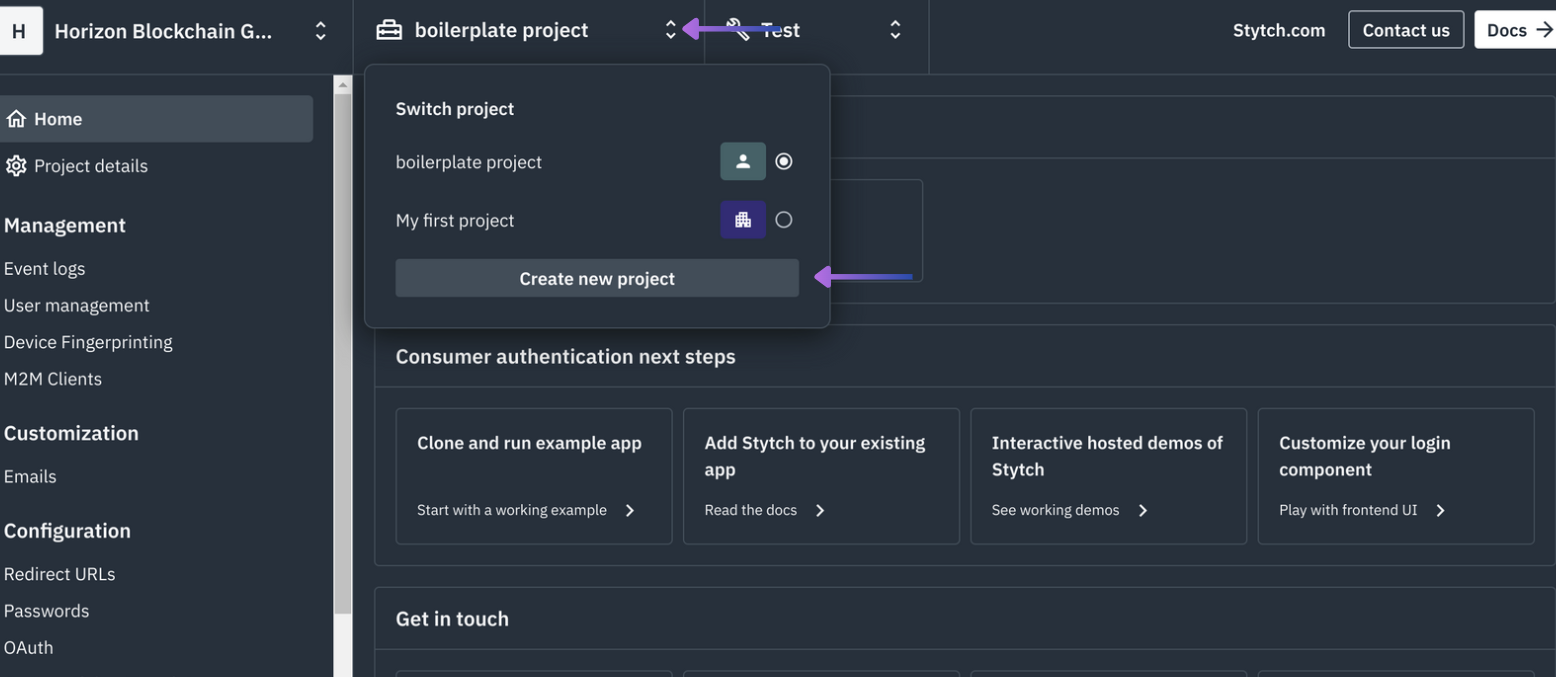
Desde el menú desplegable de proyectos, una vez que haya iniciado sesión, seleccione `Create new project`:
 Luego seleccione `CONSUMER AUTHENTICATION`:
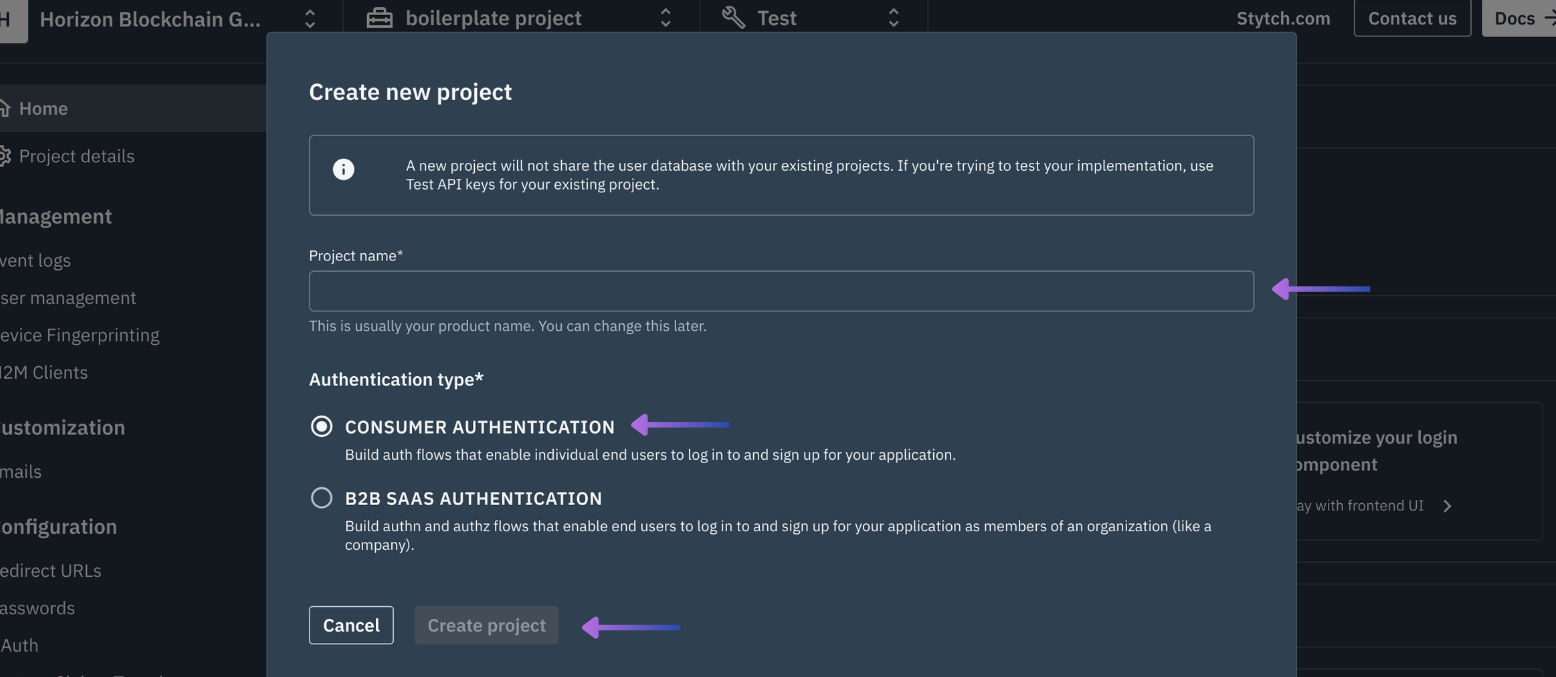 Y finalmente seleccione `Create project`
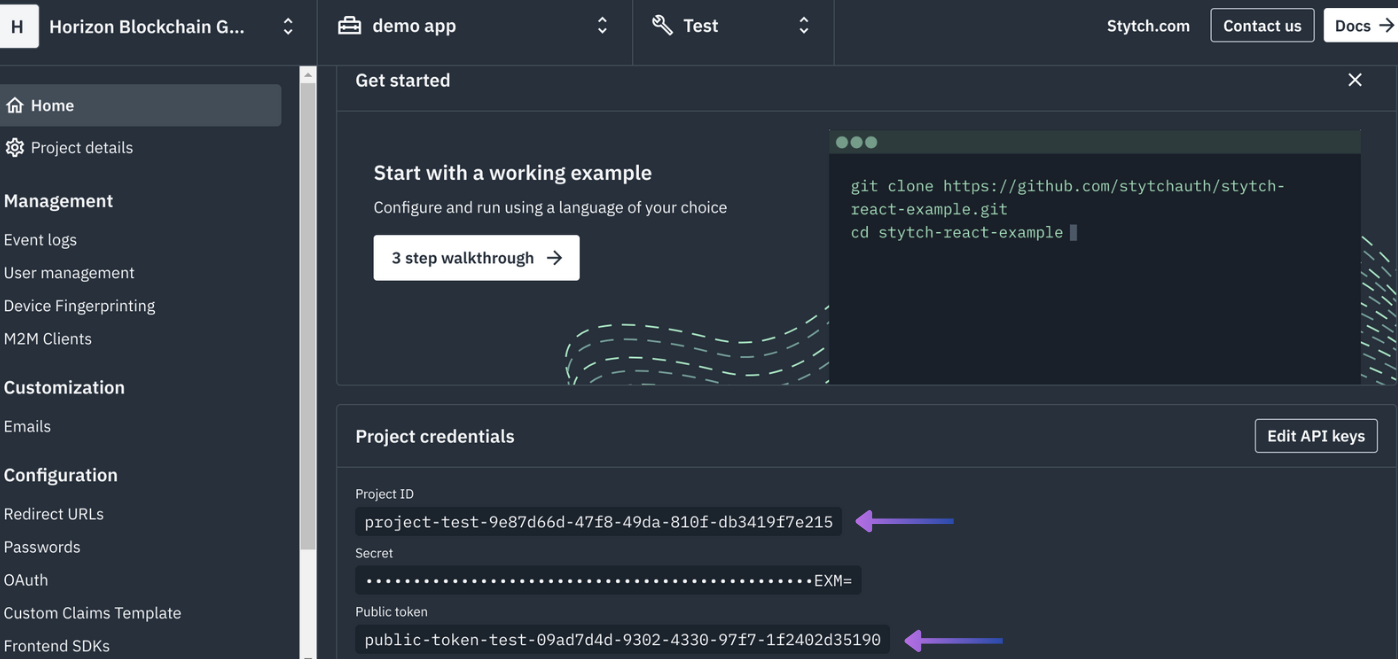
En la parte inferior de la primera pantalla de `Home`, copie y guarde en un lugar seguro el `Stytch Project ID` y el `Stytch Public Token`:
Y finalmente seleccione `Create project`
En la parte inferior de la primera pantalla de `Home`, copie y guarde en un lugar seguro el `Stytch Project ID` y el `Stytch Public Token`:
 Para desarrollo local use `http://localhost:4444/authenticate`
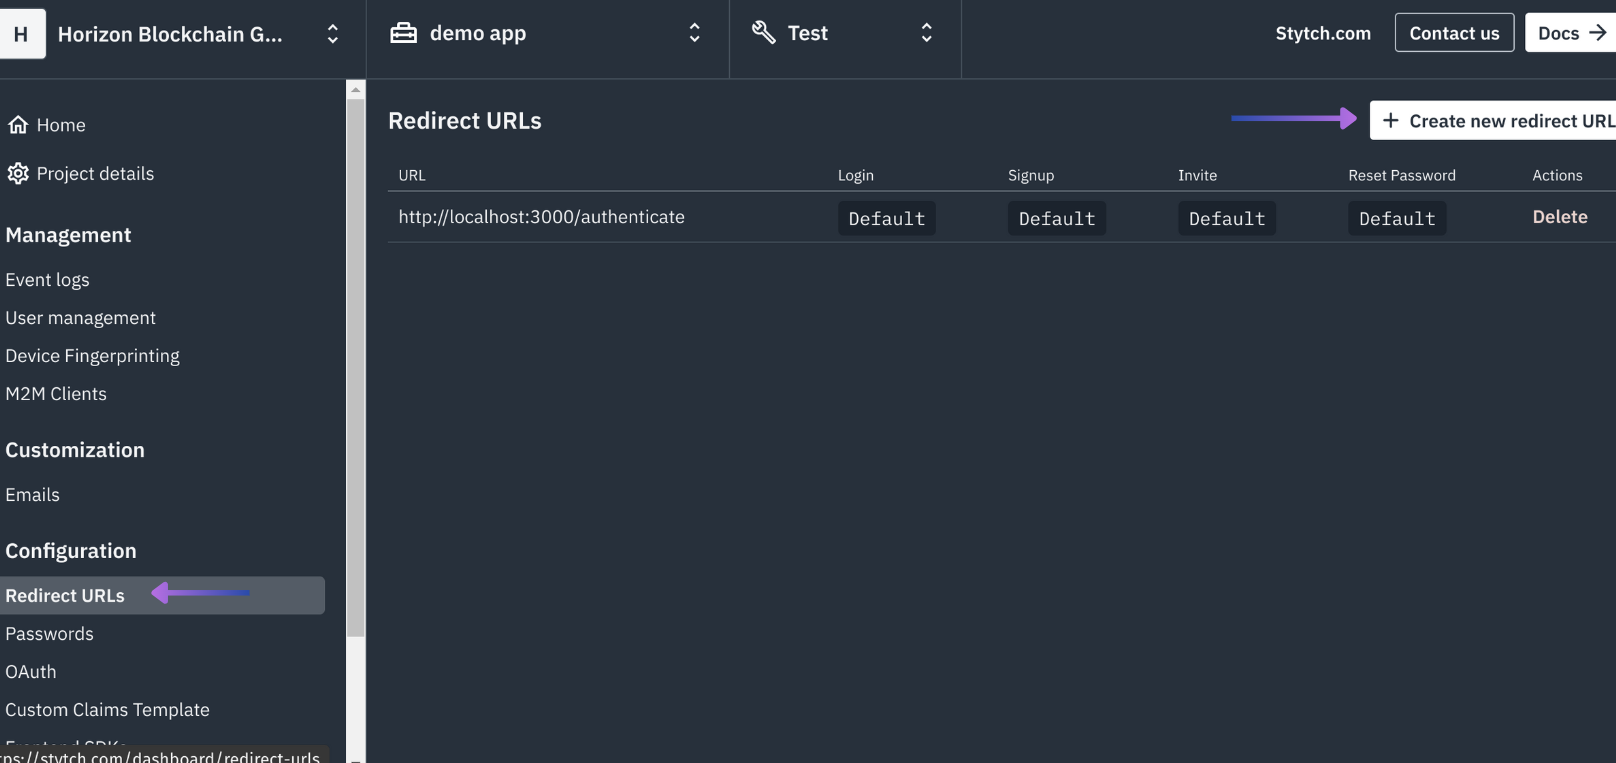 Active `Login` y `Register`, seleccione `Set as default` y luego `Confirm`:
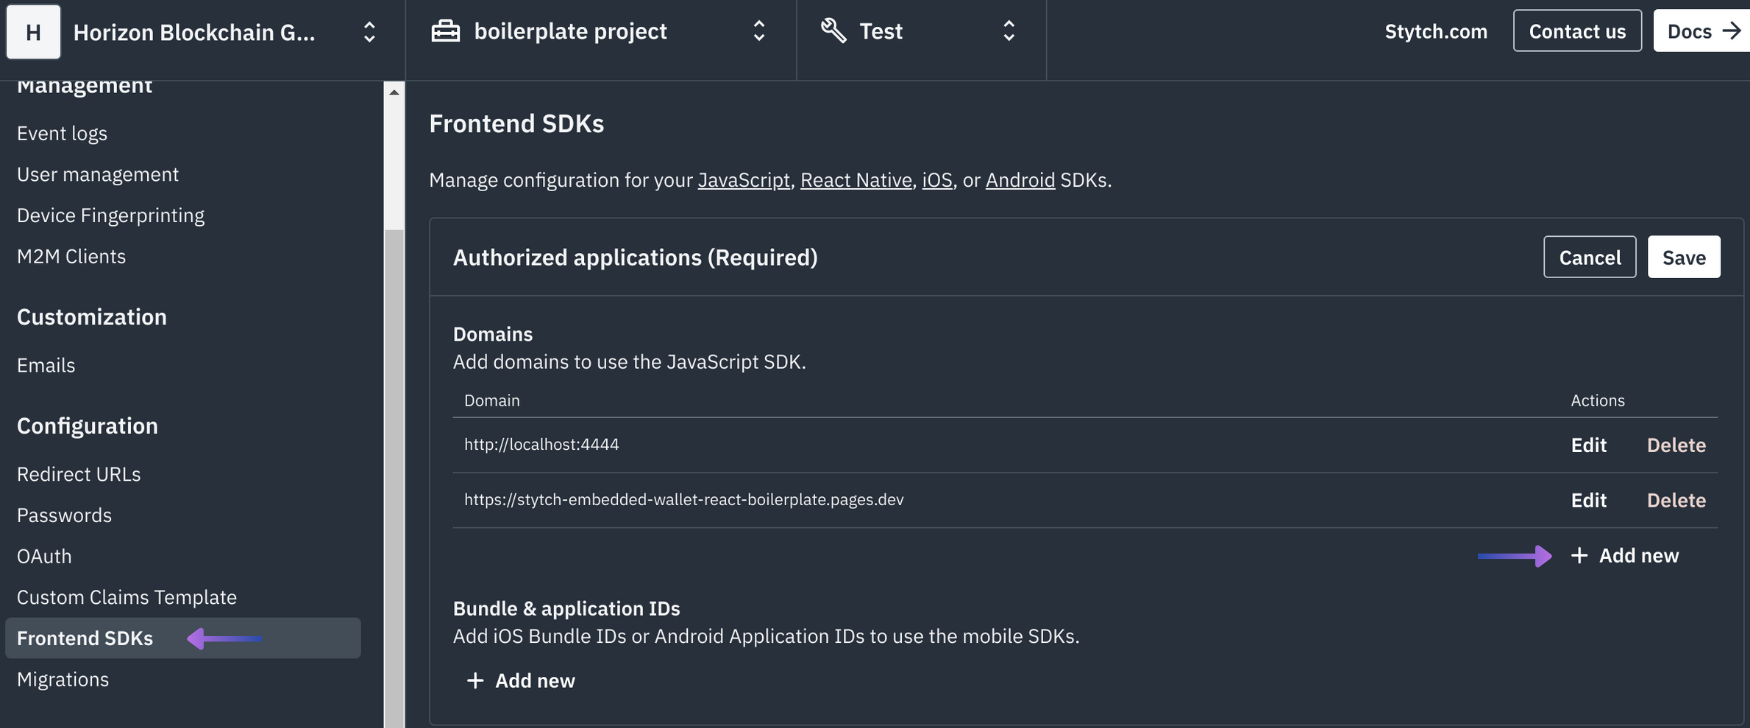
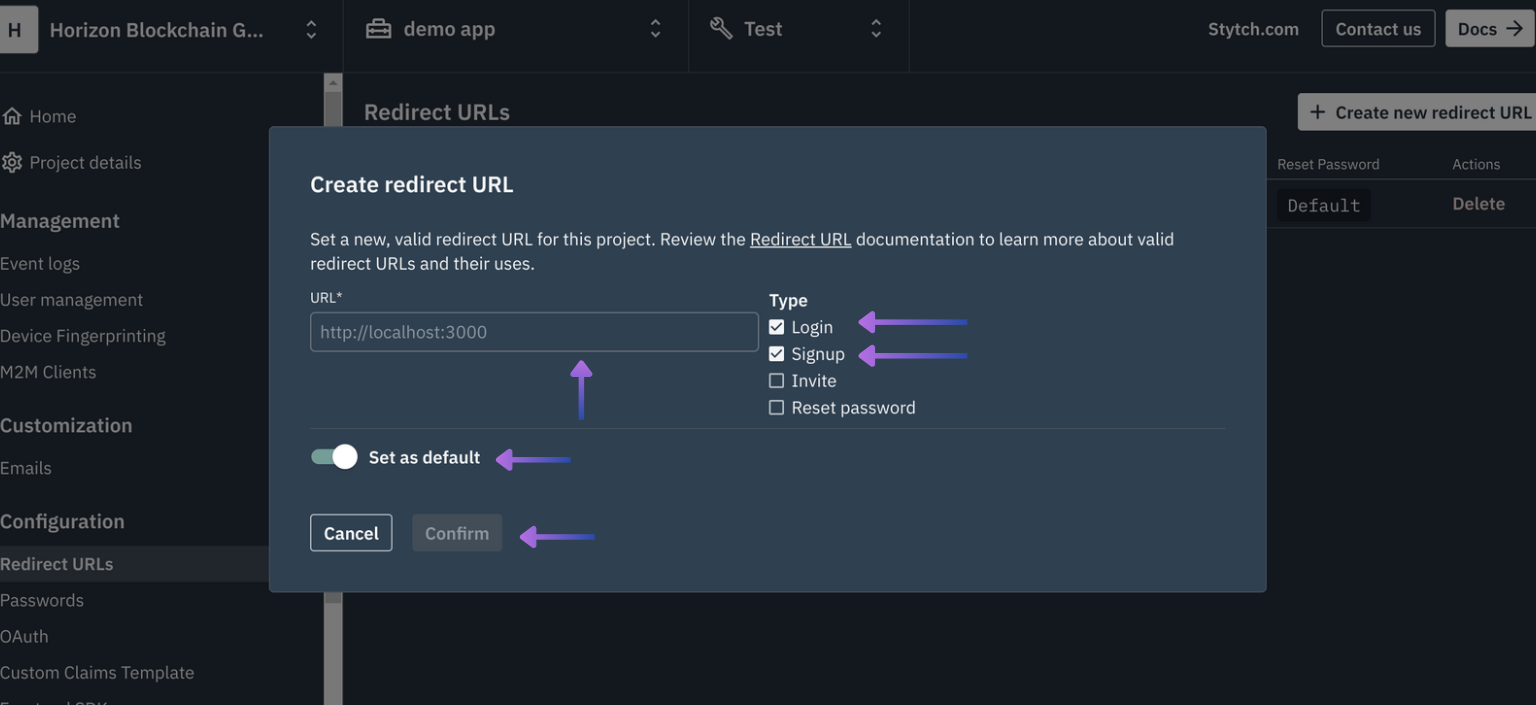 Para desarrollo local, asegúrese de que su URL de desarrollo esté correctamente ingresada, por ejemplo `http://localhost:4444`
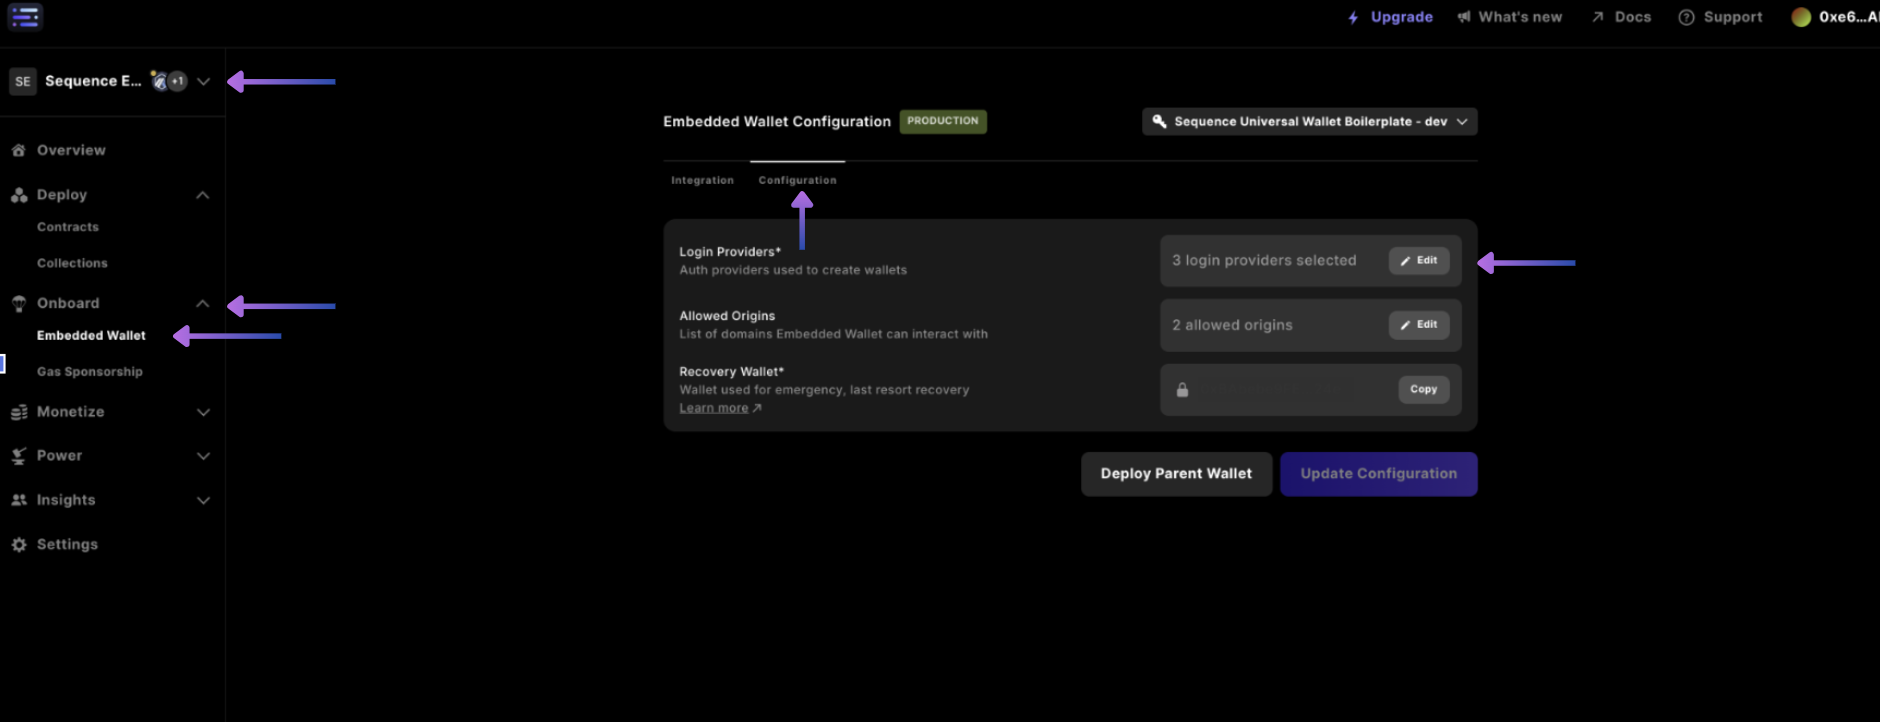
 A continuación, habilite la autenticación Stytch en Sequence Builder accediendo a su proyecto, la sección de configuración de Embedded Wallet y luego agregando un proveedor de inicio de sesión:
 Finalmente, seleccionando `Stytch` en el menú desplegable.
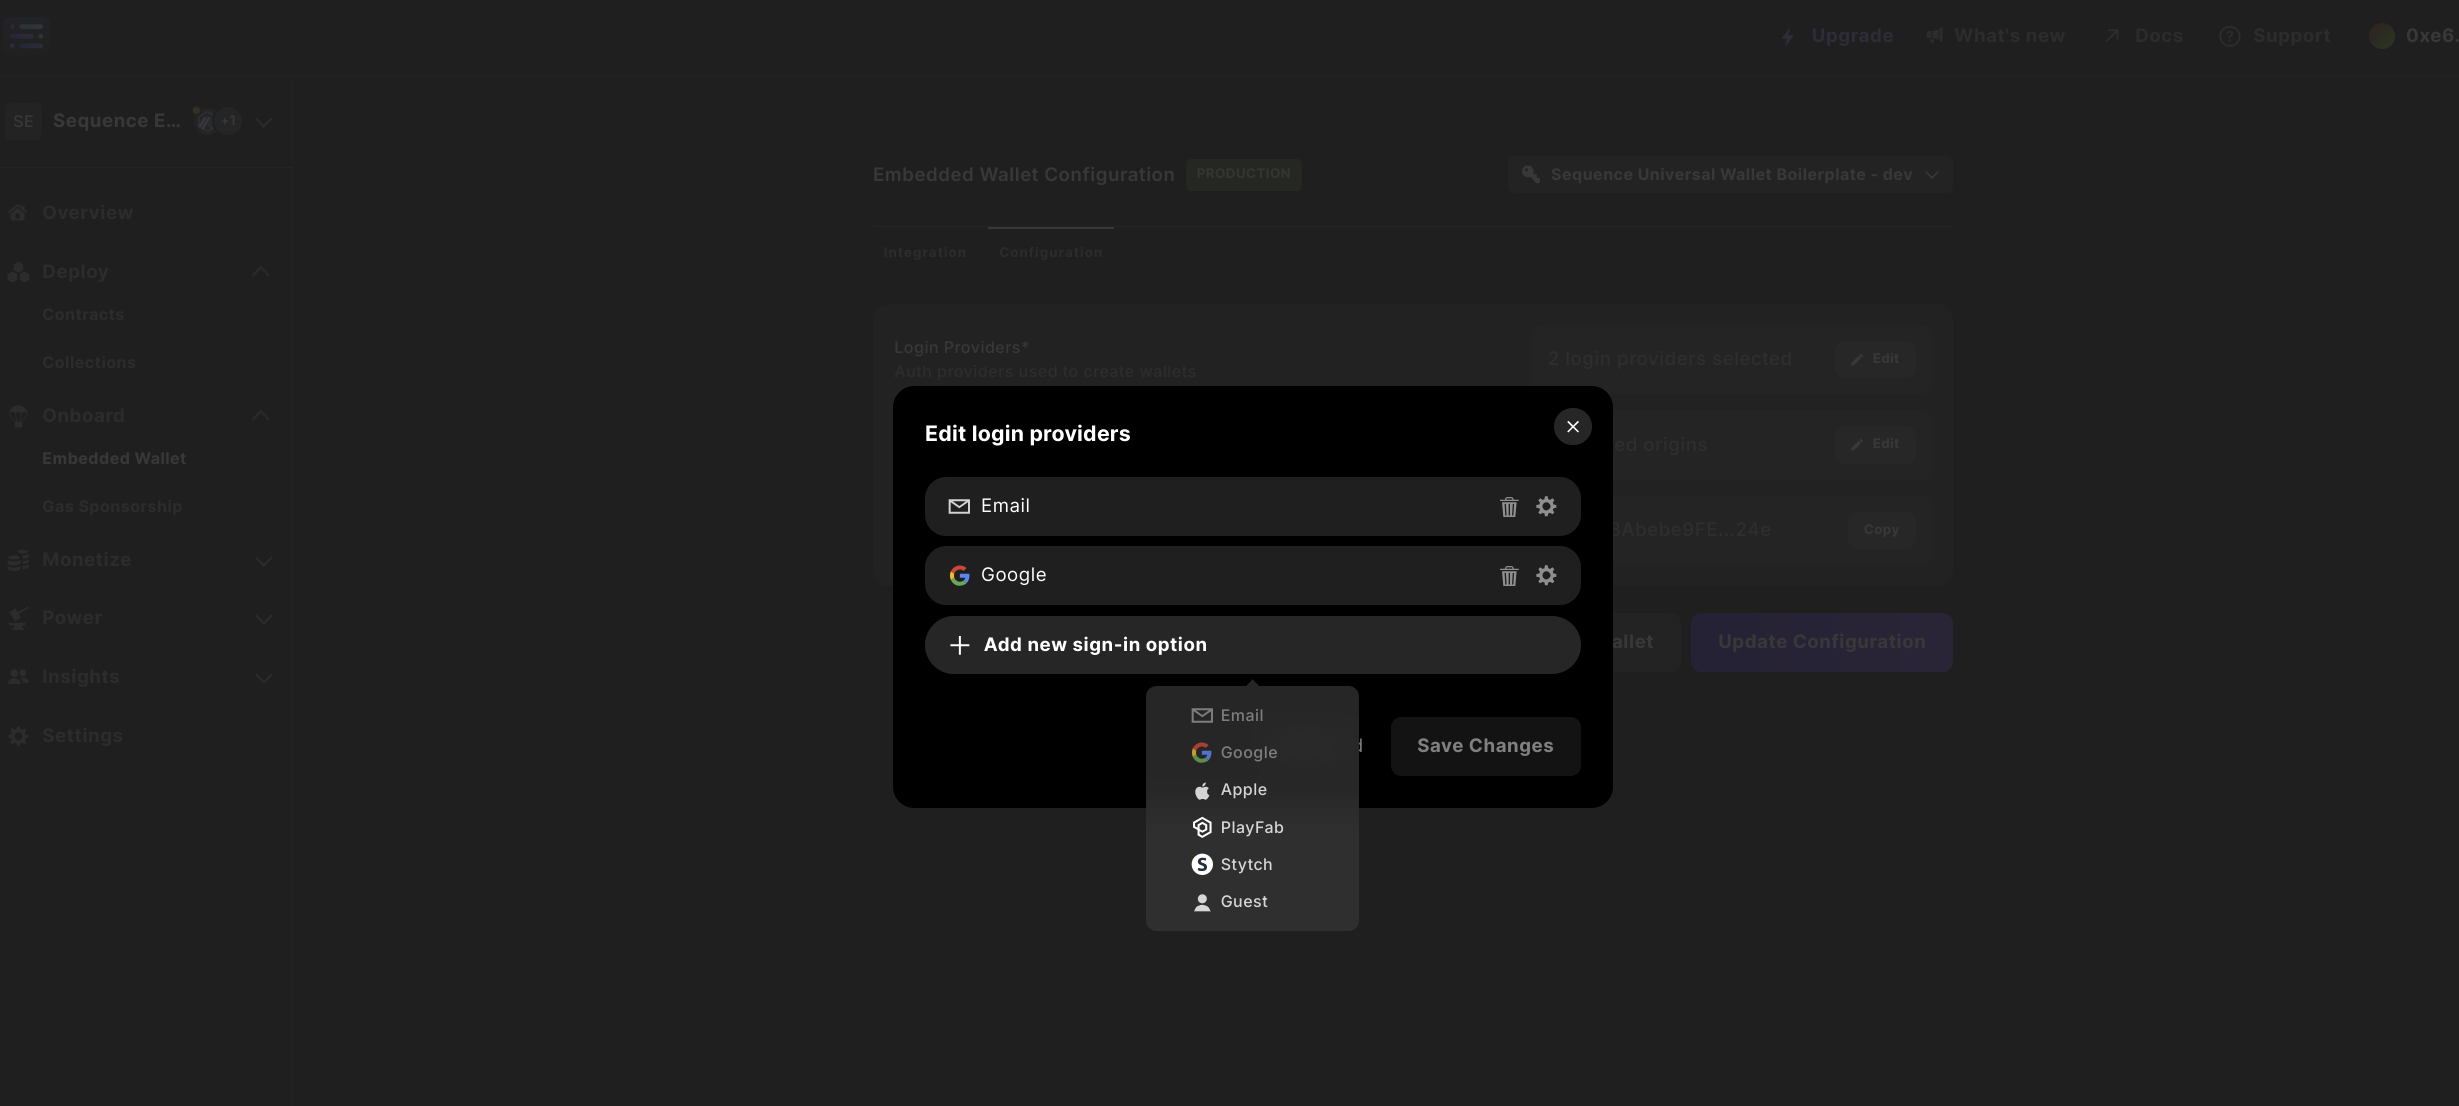 Luego ingrese su `Stytch Project ID`, seleccione `Save changes` y después el botón morado `Update configuration` para ingresar su contraseña y actualizar la configuración.