> ## Documentation Index
> Fetch the complete documentation index at: https://frenglish.mintlify.site/llms.txt
> Use this file to discover all available pages before exploring further.
# オンランプ概要
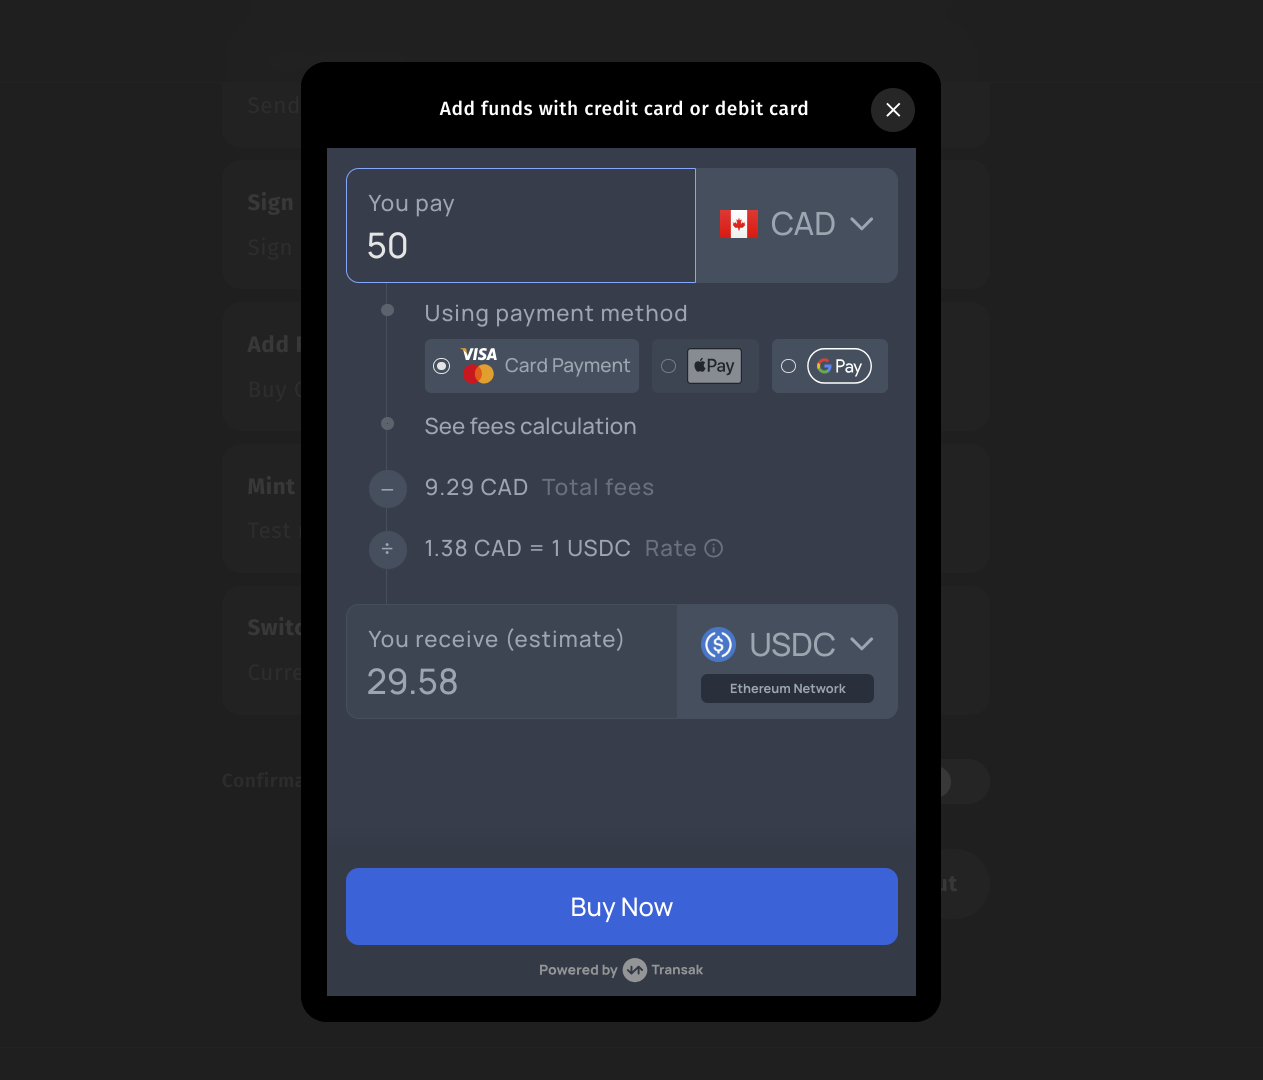
> Web SDKのチェックアウトオンランプモーダルを使うことで、開発者はユーザーを簡単にクレジットカードで法定通貨から暗号資産へオンボードできます。
このインテグレーションにより、クレジットカードでさまざまなネットワークのトークンを購入できます。
 ## インテグレーション
オンランプ機能を組み込むには、以下の手順に従ってください。
[はじめに](/sdk/web/getting-started)ガイドを完了してください。
```bash theme={null}
npm install @0xsequence/checkout
# or
pnpm install @0xsequence/checkout
# or
yarn add @0xsequence/checkout
```
```jsx theme={null}
import { SequenceCheckoutProvider } from '@0xsequence/checkout'
import { SequenceConnect } from '@0xsequence/connect'
import { config } from './config'
const App = () => {
return (
)
}
```
`triggerAddFunds` 関数を呼び出してモーダルを表示します
```js theme={null}
import { useAddFundsModal } from '@0xsequence/checkout'
import { useAccount } from 'wagmi'
const MyComponent = () => {
const { address: recipientAddress } = useAccount()
const { triggerAddFunds: toggleAddFunds } = useAddFundsModal()
const onClick = () => {
toggleAddFunds({
walletAddress: recipientAddress,
})
}
return (
)
}
```
おめでとうございます!Web SDKを使ってウォレットに資金を追加する方法を学びました。
# 構成の概要
toggleAddFundsのパラメータで利用できる設定カスタマイズオプションは以下の通りです。
```ts theme={null}
interface AddFundsSettings {
walletAddress: string | Hex // Address of the wallet where funds will be added
fiatAmount?: string // Specify the amount in fiat to add
fiatCurrency?: string // Specify the fiat currency (e.g., USD, EUR)
defaultFiatAmount?: string // Default amount in fiat to add
defaultCryptoCurrency?: string // Default cryptocurrency to use (e.g., ETH, BTC)
cryptoCurrencyList?: string // List of cryptocurrencies available for selection. Example: "USDT,BTC,USDC"
networks?: string // Specify network(s) to use for the transaction. Example: "mainnet,ethereum"
onClose?: () => void // Callback function to execute when the modal is closed
}
```
## インテグレーション
オンランプ機能を組み込むには、以下の手順に従ってください。
[はじめに](/sdk/web/getting-started)ガイドを完了してください。
```bash theme={null}
npm install @0xsequence/checkout
# or
pnpm install @0xsequence/checkout
# or
yarn add @0xsequence/checkout
```
```jsx theme={null}
import { SequenceCheckoutProvider } from '@0xsequence/checkout'
import { SequenceConnect } from '@0xsequence/connect'
import { config } from './config'
const App = () => {
return (
)
}
```
`triggerAddFunds` 関数を呼び出してモーダルを表示します
```js theme={null}
import { useAddFundsModal } from '@0xsequence/checkout'
import { useAccount } from 'wagmi'
const MyComponent = () => {
const { address: recipientAddress } = useAccount()
const { triggerAddFunds: toggleAddFunds } = useAddFundsModal()
const onClick = () => {
toggleAddFunds({
walletAddress: recipientAddress,
})
}
return (
)
}
```
おめでとうございます!Web SDKを使ってウォレットに資金を追加する方法を学びました。
# 構成の概要
toggleAddFundsのパラメータで利用できる設定カスタマイズオプションは以下の通りです。
```ts theme={null}
interface AddFundsSettings {
walletAddress: string | Hex // Address of the wallet where funds will be added
fiatAmount?: string // Specify the amount in fiat to add
fiatCurrency?: string // Specify the fiat currency (e.g., USD, EUR)
defaultFiatAmount?: string // Default amount in fiat to add
defaultCryptoCurrency?: string // Default cryptocurrency to use (e.g., ETH, BTC)
cryptoCurrencyList?: string // List of cryptocurrencies available for selection. Example: "USDT,BTC,USDC"
networks?: string // Specify network(s) to use for the transaction. Example: "mainnet,ethereum"
onClose?: () => void // Callback function to execute when the modal is closed
}
```